As planned on Monday April 10th, 2023 we started aerating and sand topdressing the fairways at Granite Bay Golf Club. The plan was to aerate and topdress the front nine fairways the week of April 10th on a Monday and Tuesday and follow up with the same process on the back nine on Monday and Tuesday of the following week. On the Mondays the club would be closed and on the Tuesday's we would alternate front nine and back closures so the process could be completed in a productive manner, as well as keeping Member disruption to a minimum.
Below are pictures of the process in a somewhat sequential order for those who are interested. Additionally we have some pictures covering a deep tine aeration of the front nine greens we did while the front nine was closed. Don't worry, the process is very non-disruptive but extremely beneficial.
 |
Step #1 is to flag the sprinkler heads, valve boxes & yardage markers. Colors of the flags mean something. White for a sprinkler head or yardage marker. Pink for a sprinkler head or valve box that needs raising or leveling and red for a valve box. Flagging these items is essential because the aerifyer to follow will destroy them. |
 |
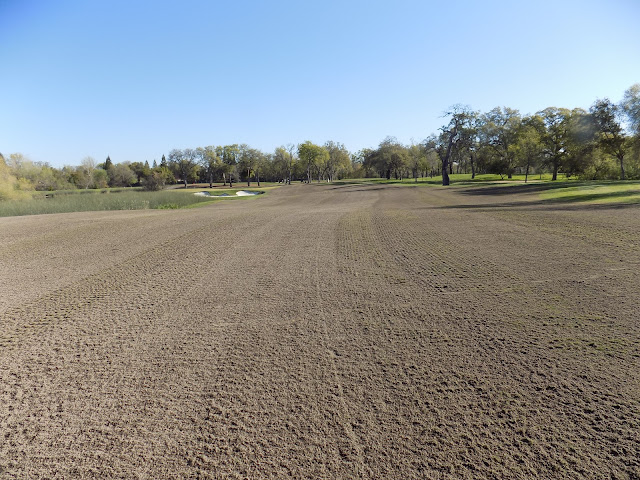
Step #2 - Aerify. We are punching solid holes that are 5/8" X 2"- 3" deep. The tufting around the holes is due primarily to the height of the Santa Anna Hybrid early in the season. If you recall, it is a best management practice to raise the height of cut of the Santa Anna prior it going dormant in the winter. This allows for better winter play and protects the Santa Anna stand from wear and tear when it is not growing. This tufting will mow out and recover quickly as the weather starts to be more conducive to Hybrid Bermuda growth and recovery. |
 |
Step #3 - Apply Topdressing Sand. This is the slow process. It takes time to move the strategically placed sand and spread onto the fairways. And it takes time and hopefully warm weather to dry that sand out so we can get it drug into aeration holes and the turf canopy. |
 |
This is what #1 fairway looked like after we topdressed it. This represents 30 tons per acre. We switched sand this year to a washed tee sand that is substantially more consistent then what we used in 2022. It is also a little coarser which is agronomically better for Hybrid Bermuda as the finer sands will hold on to more moisture then necessary and this washed sand will drain better which will lead to a drier playing surface which is what we all want. |
 |
Step #4 - Dragging the Topdressing Sand. This is an end of the day process which really needs the sand to be dry in order to drag it into aeration holes and turf canopy. It is also a dusty process that should not be done in the presence of golfers. We use a keystone mat to drag in the topdressing and on subsequent days we use our turbine blowers to disperse the pockets of sand that accumulates here and there, and help push the sand into the turf canopy where it belongs. |
 |
Another look at the dragging process with a better look at the keystone mat. |
 |
After an evening watering and mowing. |
 |
Close-up after some irrigation and mowing. Subsequent blowing with our big turbine blowers, as obnoxious as they are, will help disperse and push the sand further into the turf canopy, but in a very short period of time with some warm weather the Santa Anna will fill in and grow right through the sand.
|
 |
Remember the pink flags we spoke of earlier in step #1? Above depicts the work that was being done by multiple GCM workers doing during this aeration and topdressing process. This particular picture shows a large amount of sod removed and replaced after leveling a sprinkler head and the area surrounding the head. This work will go along way to "finishing" these fairways. We had over 100 pink flags on the F9.
|
Putting Surface Deep Tine Aeration
The re-building process we did to our greens in 2021 is referred to as "re-surfacing" not a complete re-build. We basically removed 4-6 inches of sod and sand, replaced that with a new greens mix sand, shaped and seeded into that. The remaining 6-8 inches of old sand remained. Rooting of the new bentgrass into this older sand / greens mix is positively impacted by the presence of air. That is what this deep tine aeration will do, provide columns of air in which the deep rooting bentgrass will go.
The benefits of deep rooting are multifaceted with the main one being we can deep water the greens more effectively creating a scenario where we dont have to irrigate them as frequently. Less frequent irrigation means a firmer surface. A firmer surface means a truer, faster surface that is not as prone to ball marks. All things that we are striving for. Below are pictures of the process.
 |
Here is our Verti-Drain Deep Tine Aerator on the nursery green. This is the first time we have used this process on these young greens and we were very impressed with how the greens handled the procedure. There was no heaving of the surface requiring rolling afterwards and no damage to the greens. |
 |
When I mentioned above there was no damage to the greens, I say this because this is a violent machine that drives a coordinated series of steel spikes 7" into the green. The greens have to be in a firm state, and you have to have the right operator, but the risk reward can be huge in time. Deep roots equal great putting surfaces.
|
 |
Here is the finished product. Holes that are spaced out 4" to a depth of 6" - 7". These holes are 1/8"-1/4" max in diameter and do not effect putting quality. We dident topdress the greens afterwards this time but the process can be done with a light topdressing as well. |
